
3D Pumpkin Life Cycle Craft
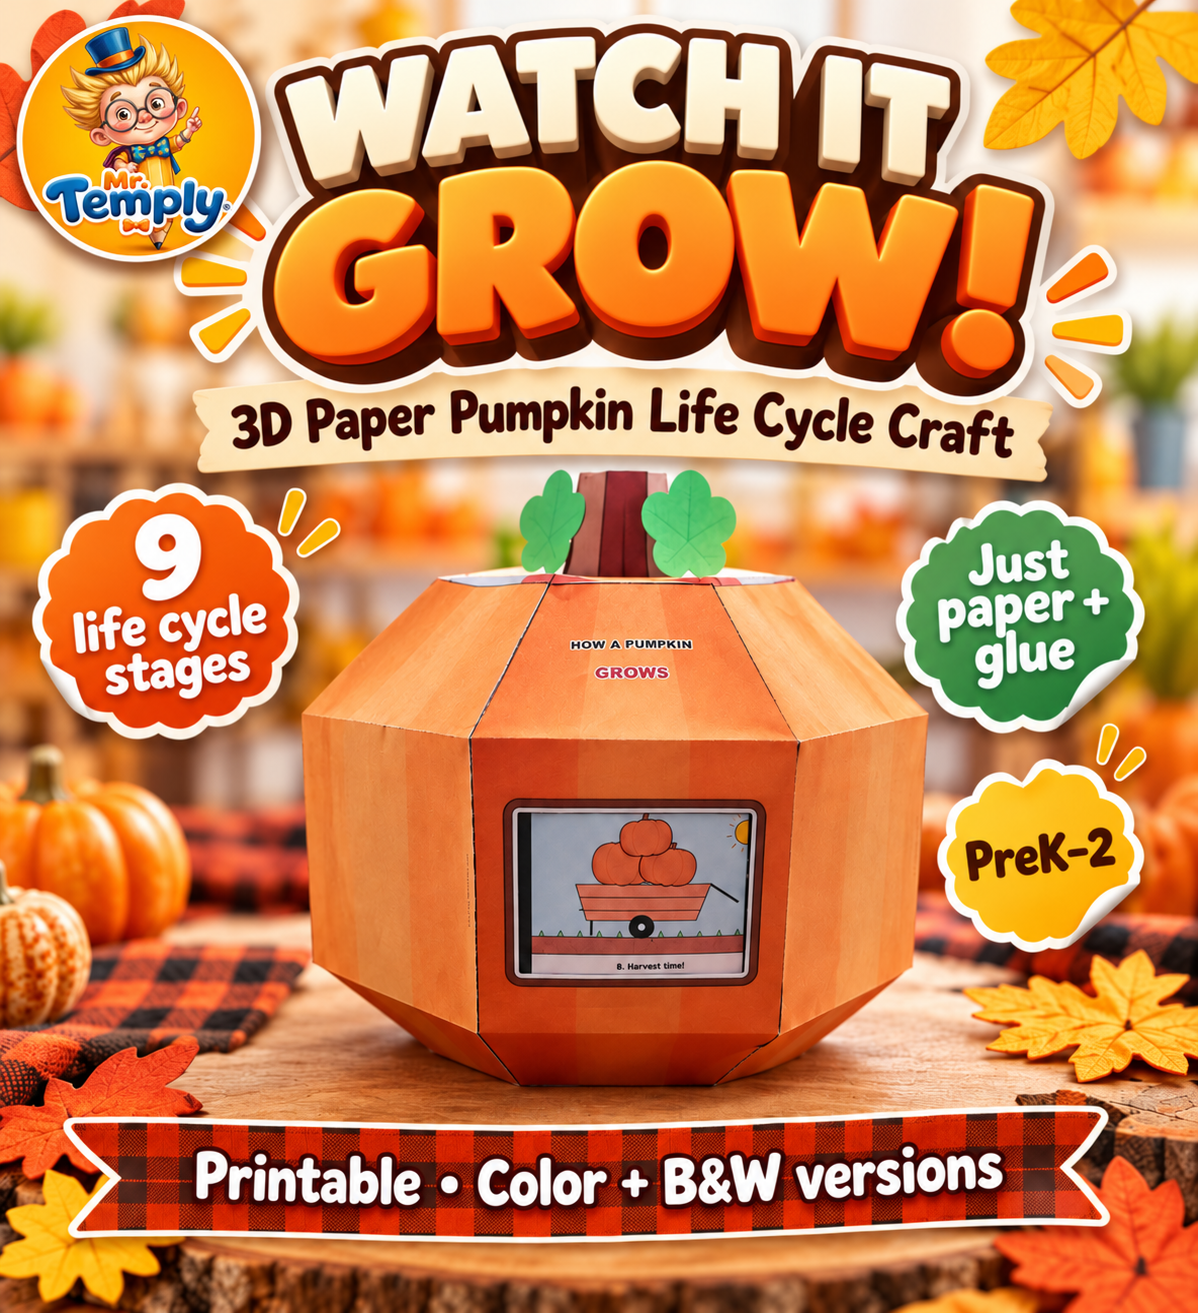
Build a paper pumpkin that “grows”! Push the picture ring inside and watch 9 stages of the pumpkin life cycle appear in the window, from seed to harvest.
- 9 life cycle stages
- 15 printable pages
- Color + B&W versions
$2.98 · PDF download
See it in action
Slide the strip and the picture in the window changes — from a tiny seed to a ripe pumpkin and new seeds.
- 9 pictures on one paper ring
- Kids push the strip with one finger
- Color and black-and-white versions included
How it works
A picture ring lies inside the pumpkin and is held by 10 paper belt loops. A finger in the slot at the back slides the ring, and the next picture appears in the front window.
Print & cut
Print the pages at 100% and cut out the pumpkin parts, lid, bottom, stem, leaves, picture ring and loops.
Build the pumpkin
Fold and glue the 8 ribs into a pumpkin, slide the picture ring under the loops and add the lid with the stem.
Watch it grow
Push the ring through the back slot. Picture by picture, the pumpkin grows — and after stage 9 the cycle starts again.
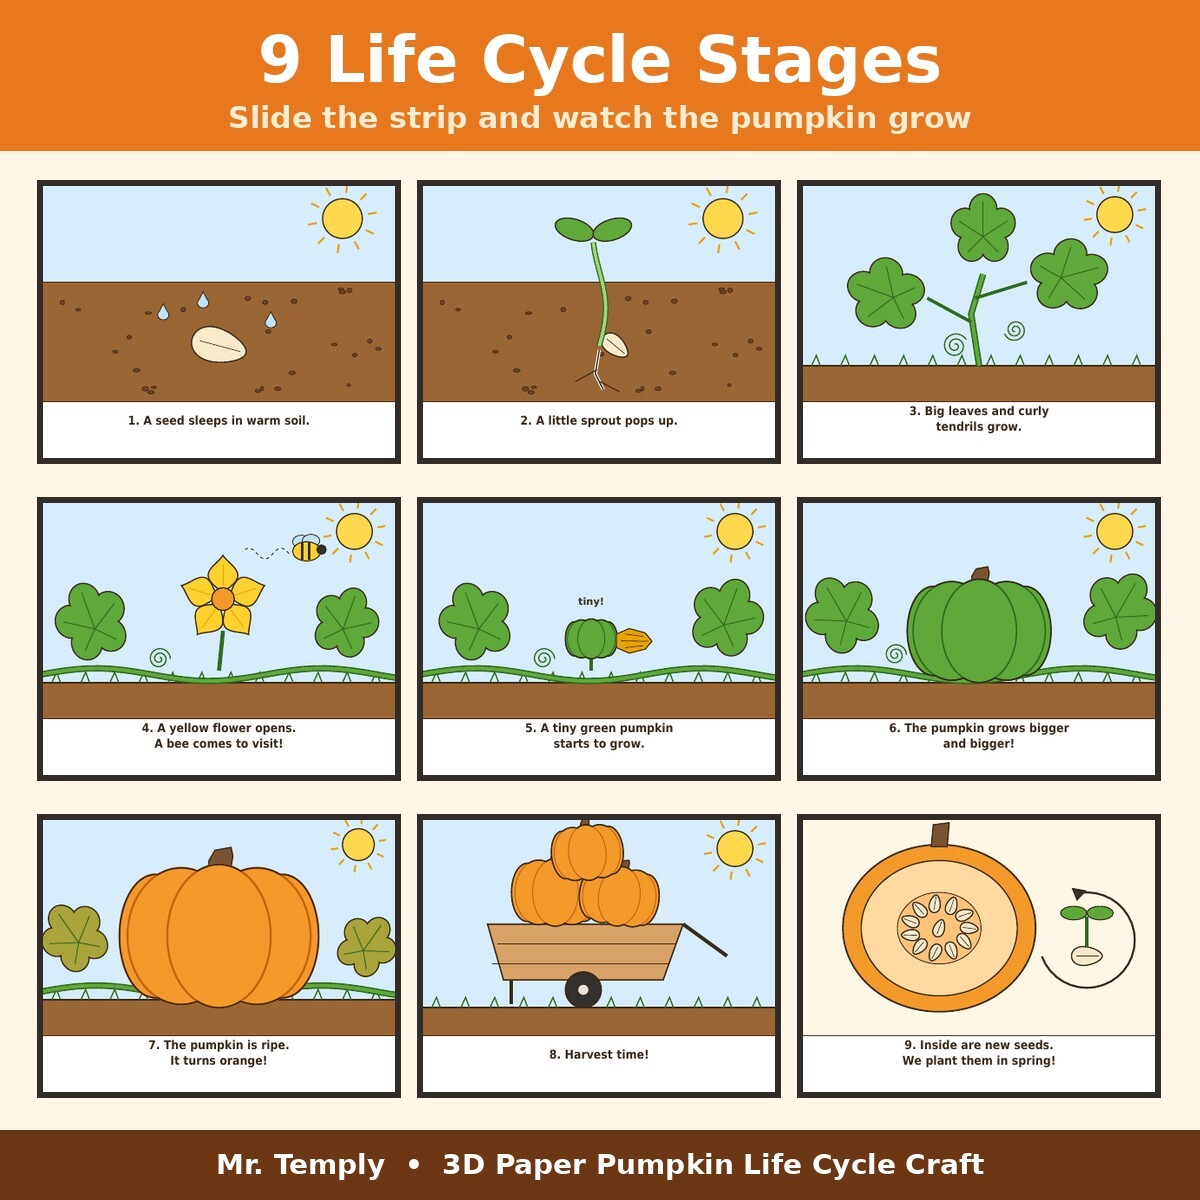
The 9 stages of the pumpkin life cycle
Each picture has a short caption, so students can name and sequence every stage.
- A seed sleeps in warm soil
- A little sprout pops up
- Big leaves and curly tendrils grow
- A yellow flower opens
- A tiny green pumpkin starts to grow
- The pumpkin grows bigger and bigger
- The pumpkin is ripe and turns orange
- Harvest time!
- Inside are new seeds for spring
What’s included
One 15-page PDF with everything you need to build the pumpkin.
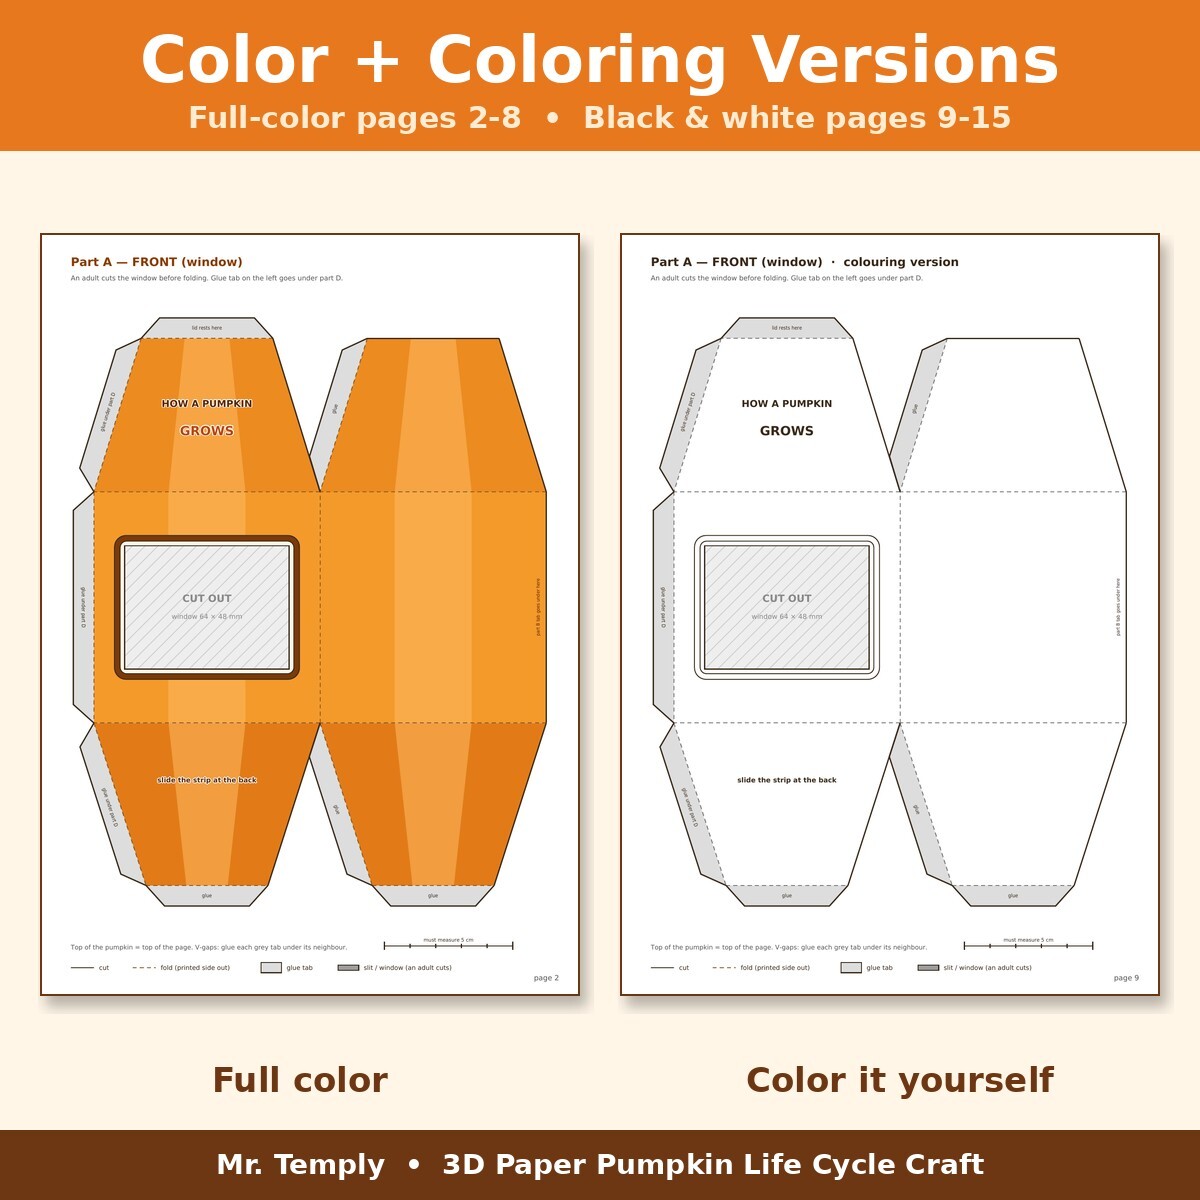
Color + coloring versions
Full-color version on pages 2–8. Black-and-white version on pages 9–15, so students can color their own pumpkin and pictures.
Step-by-step instructions
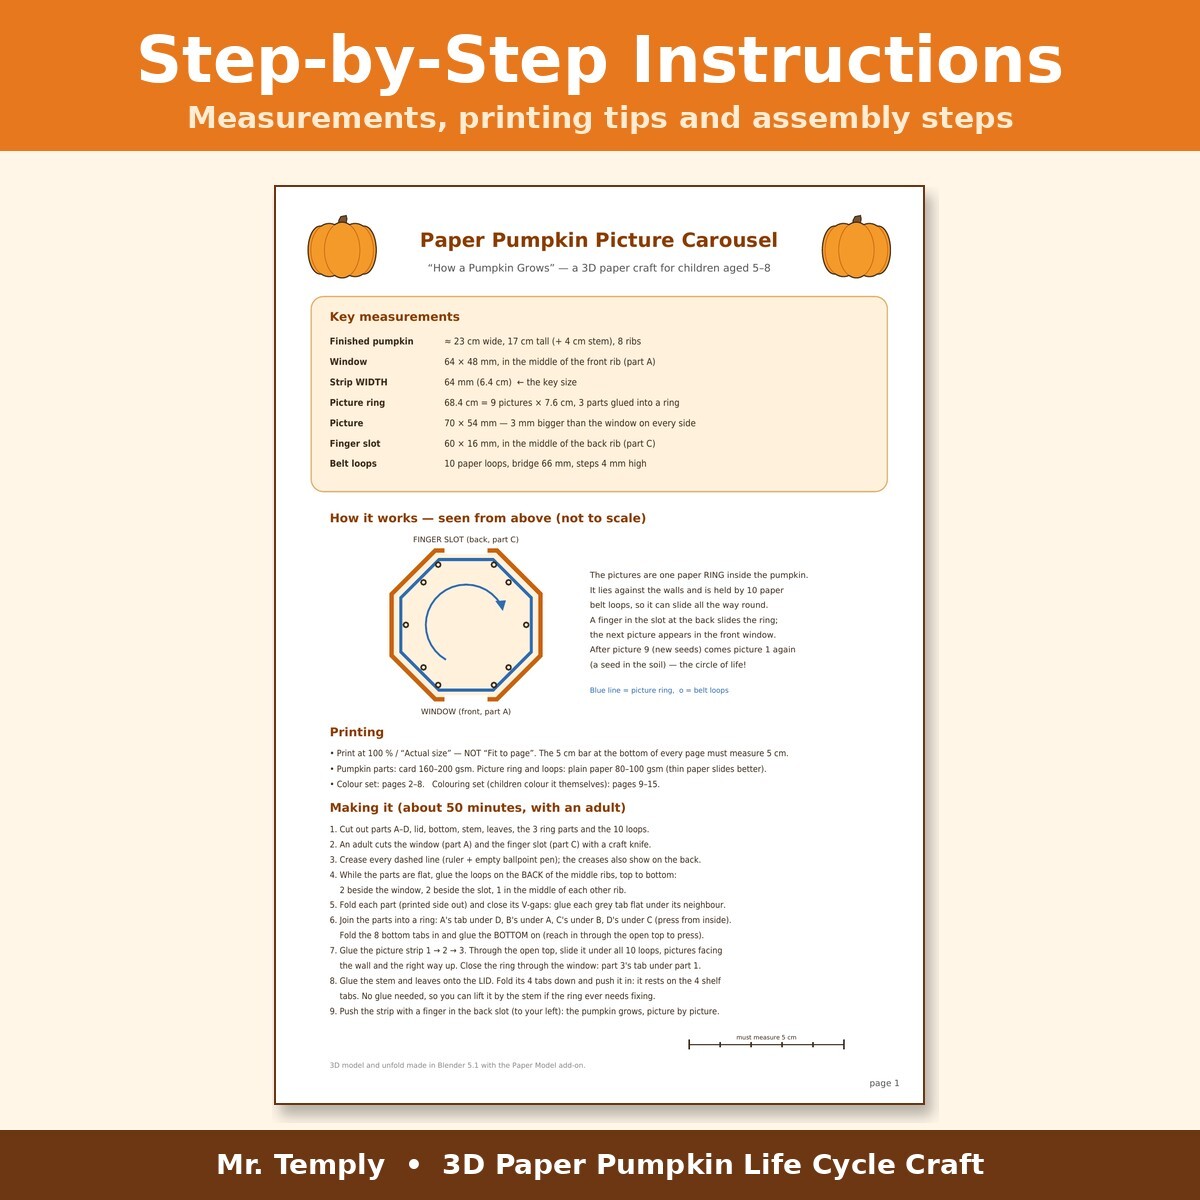
Page 1 has the key measurements, printing tips, a diagram of how the ring works and 9 assembly steps.
- Finished pumpkin: about 23 cm wide and 17 cm tall (+ 4 cm stem)
- Window 64 × 48 mm in the front rib
- You need: card stock, plain paper, scissors and glue
- An adult cuts the window and finger slot with a craft knife
Before you print
- Pages are formatted for A4.
- Print at 100% / “Actual size”, not “Fit to page”. The 5 cm bar at the bottom of every page must measure 5 cm.
- Pumpkin parts: card stock 160–200 gsm. Picture ring and loops: plain paper 80–100 gsm (thin paper slides better).
- Designed for children aged 5–8. Making it takes about 50 minutes with an adult.
Perfect for
A hands-on way to teach the plant life cycle this fall.
- Pumpkin week
- Fall science lessons
- Plant life cycle units
- Science centers
- Classroom displays
- Homeschool
Ready to watch it grow?
Download the PDF on Teachers Pay Teachers and build your pumpkin this week.
Get it on TPT — $2.98